
An oil mark under a gearbox is not always a minor housekeeping issue. Lubricant protects gears, bearings, and seals, so a continuing leak can turn into noise, heat, contamination, or an unplanned shutdown. The right response is not to tighten every bolt or add more oil immediately. First identify the fluid, where it leaves the housing, and whether the leak is tied to a condition that can damage the drive or create a safety hazard.
This guide is for maintenance engineers and equipment supervisors assessing an installed industrial gearbox. It helps separate a controlled external seep from a leak that requires shutdown and professional inspection. It does not replace the machine manufacturer’s safety procedure or the gearbox service instructions.
What a gearbox oil leak can look like
Oil may collect at a shaft seal, housing joint, inspection cover, breather, drain point, or mounting surface. A wet path that starts high on the housing may look like a failed lower seal even when the actual source is above it. Dust often hides this path and turns it into a dark, sticky layer. On clean equipment, a leak may first appear as a ring of oil around a shaft or a damp area at a joint.
Do not assume that every wet surface is a gearbox leak. Grease from adjacent bearings, hydraulic fluid, cleaning chemicals, or process material can migrate onto the reducer. Confirm the fluid type and trace it back to the highest fresh point before choosing a repair.
Common causes, ordered by how often they should be checked
A damaged, worn, or incorrectly fitted shaft seal
Shaft seals are common leak points because they operate at the boundary between a rotating shaft and a stationary housing. Normal wear, abrasive dust, shaft-surface damage, misalignment, vibration, or an installation error can prevent the sealing lip from maintaining contact. A seal replacement alone may not solve the problem if the shaft has a groove or runout, or if the driven equipment keeps pulling the gearbox out of alignment.
Excess internal pressure from a blocked or unsuitable breather
As lubricant warms during operation, the air volume inside the housing changes. The breather must allow this pressure to equalize while limiting entry of contamination. A blocked breather can force oil past seals and gaskets. A breather exposed to heavy dust, washdown, or an unsuitable location can also create a contamination path. Inspect this item before condemning several seals at once.
Overfilling, incorrect lubricant, or an incorrect oil-level check
Oil level must be checked using the manufacturer’s stated mounting position and procedure. If a gearbox is checked after it has been moved, mounted differently, or stopped in an unsuitable condition, the apparent level may be misleading. Excess oil can churn, foam, and escape through breathers or seals. An incompatible lubricant can affect seal materials or behave differently under operating conditions. Adding oil without finding the source can conceal a serious loss while worsening overfill.
Loose covers, damaged gaskets, or housing-joint problems
Inspection covers, plugs, adapters, and housing joints can seep when a gasket has aged, a surface is scratched, fasteners have lost clamping force, or prior servicing damaged a sealing face. Repeated retightening without the correct procedure can distort a cover or strip threads. Check for a clear leak path around the joint rather than relying only on the wettest spot.
Installation stresses and operating vibration
Poor foundation rigidity, loose mounting bolts, pipe or coupling loads, belt tension, driven-shaft misalignment, and process vibration can repeatedly load the gearbox housing and seals. A leak that returns quickly after repair is often evidence that the root cause is installation or operation rather than the replacement part itself. Look for fretting marks, shifted shims, damaged coupling elements, or evidence that the unit moves under load.
Damage from impact, corrosion, or poor prior repair
A cracked housing, stripped plug thread, corrosion at a joint, or sealant applied to a contaminated surface can create a persistent leak. These cases need a broader condition assessment. A repair that leaves damaged threads or a distorted sealing face in service may fail again and may compromise the housing.
A safe way to diagnose the leak
Start by applying the site lockout and isolation procedure. If the leak is near moving couplings, belts, chains, electrical equipment, or hot surfaces, do not inspect it while the machine is running unless the site risk assessment explicitly permits an appropriately guarded observation. Never reach around rotating parts to trace an oil path.
With the equipment safely stopped, clean only the outside area needed to locate the source. Do not use aggressive cleaning methods that force debris into breathers or seals. Record the mounting position, product nameplate, lubricant appearance, leak location, and any related symptoms such as noise, vibration, heat, or poor output. After a controlled return to service, inspect from a safe distance and look for the first fresh trace.
Review maintenance records at the same time. Ask whether lubricant was recently changed, the gearbox was moved, a coupling or motor was replaced, the driven machine jammed, or washdown conditions changed. These events often explain a new leak more clearly than the oil mark itself.
What to do after identifying the likely cause
For a light external seep with no contamination, abnormal sound, heat, or oil-level concern, schedule a documented inspection and monitor whether the condition changes. Do not describe it as harmless until its source is known.
For a breather, gasket, plug, or seal issue, use the correct approved parts and service procedure. Confirm the shaft and housing surfaces, mounting alignment, and lubricant specification before reassembly. Keep the work area clean; contamination introduced during repair can create a second failure.
If the oil is contaminated, the gearbox is noisy or hot, the shaft has visible damage, the housing is cracked, or the leak follows a process upset, stop treating the issue as a seal-only repair. The internal condition, load path, and replacement suitability need professional review.
When replacement is safer than repair
Replacement should be considered when the housing or critical shaft interface is damaged, when internal wear is suspected, when repeated repairs have not corrected the leak, or when downtime risk makes a field rebuild unsuitable. It is also appropriate when the installed gearbox no longer matches the actual duty, mounting arrangement, or environmental conditions. A dimensional match alone does not prove that a replacement will solve the underlying problem.
Do not dismantle a gearbox on the floor of a dusty, wet, or uncontrolled site simply to inspect a leak. Stop the machine and use qualified service support when loss of containment could create a slip hazard, environmental release, fire risk, electrical exposure, load movement, or damage to connected equipment.
For the family review, consult NMRV worm gearbox series and vertical cycloidal reducer series. Confirm the installed model and application before selecting a replacement.
Send the nameplate before ordering a replacement
Take a clear photo of the gearbox nameplate and include pictures of the leak location, shaft arrangement, mounting, and driven machine. Tell us when the leak began and whether noise, heat, vibration, or a recent installation change occurred. Send your nameplate to HaoRan Transmission so we can help confirm the model and a suitable replacement path before a repair decision becomes an application mistake.
More reading: gearbox selection and maintenance articles.
Continue to a family review
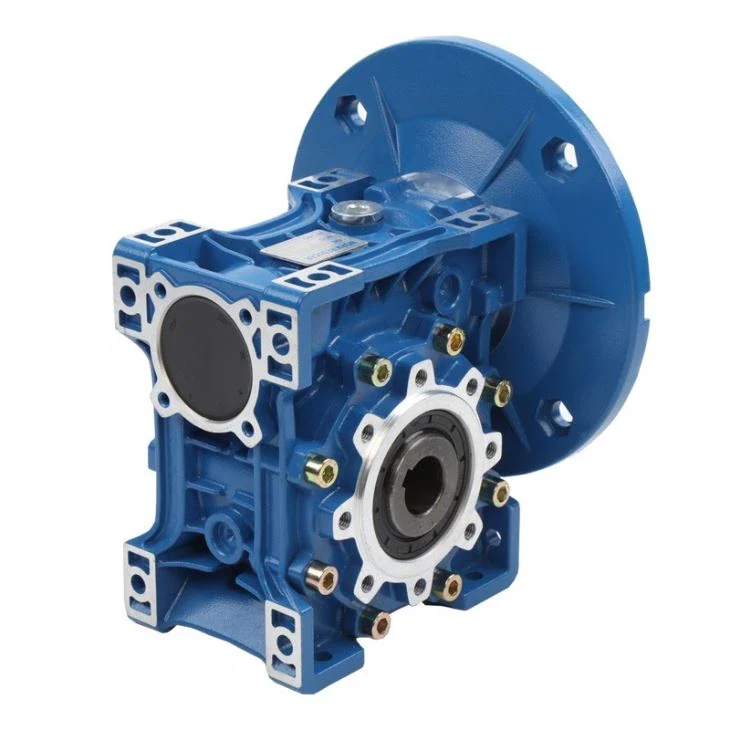
NMRV series
If the existing drive has overheated, leaked, vibrated or failed under a changed duty, describe that context as well.
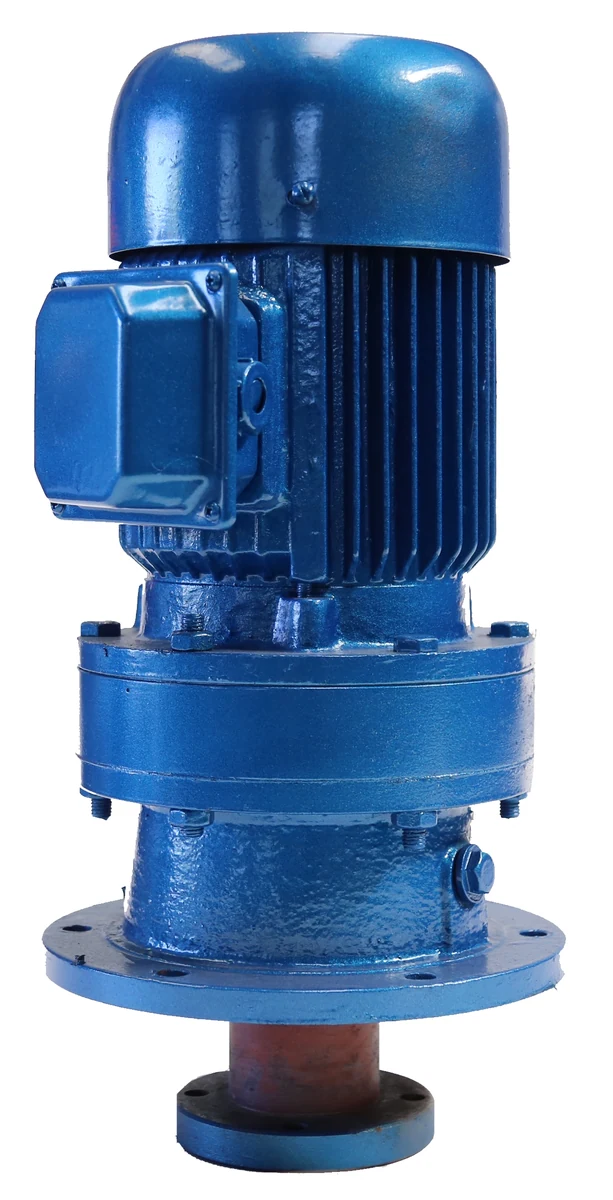
Vertical cycloidal reducers
If the existing unit has a history of leakage, vibration, noise or difficult maintenance, add that information to the inquiry record.
READY FOR A TECHNICAL REVIEW?
Send your nameplate, get a mounting review within one business day.
Or message us directly